You guys.  YOU GUYS! I am SOOO excited about a project I’ve been working on.  I’m practically dying to share it with you but it needs to cook just a little longer before it’s ready to share with the world Oklahoma.


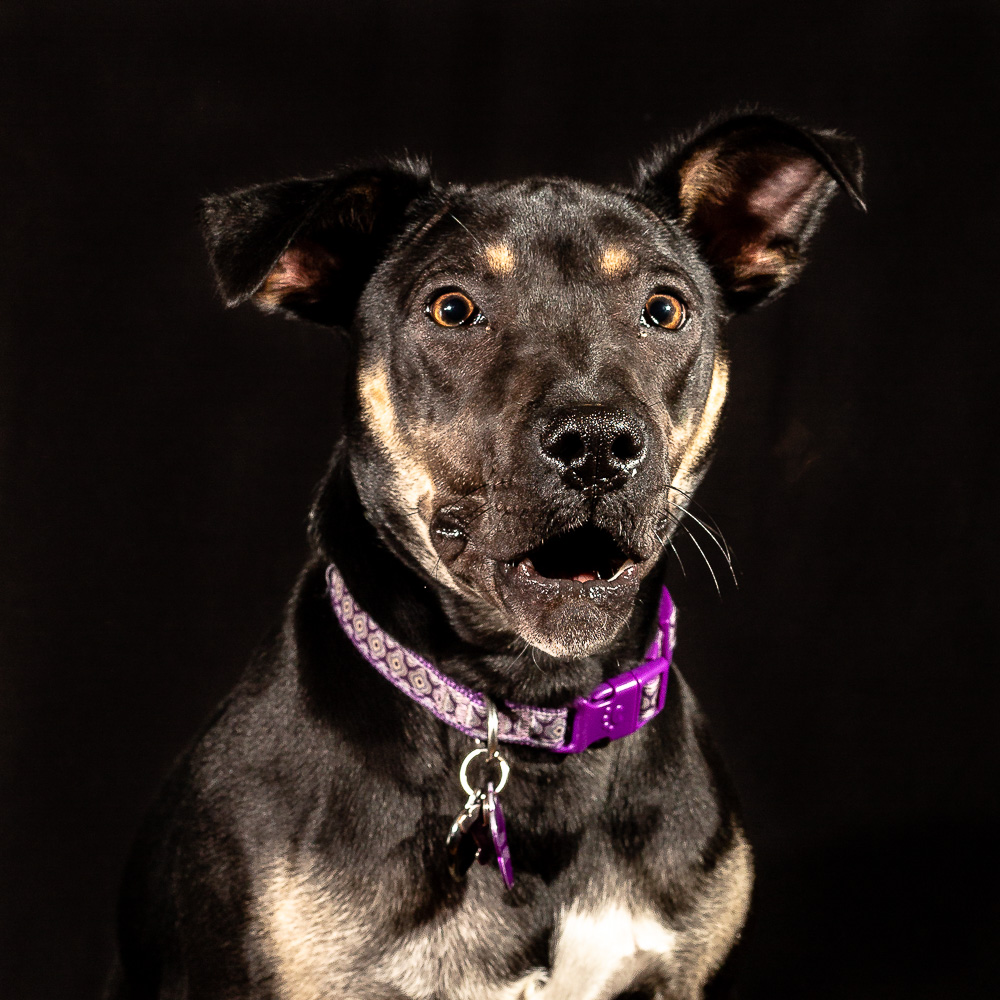
Bonnie is shocked at how much FUN
her session was!

Here’s what I’m up to:

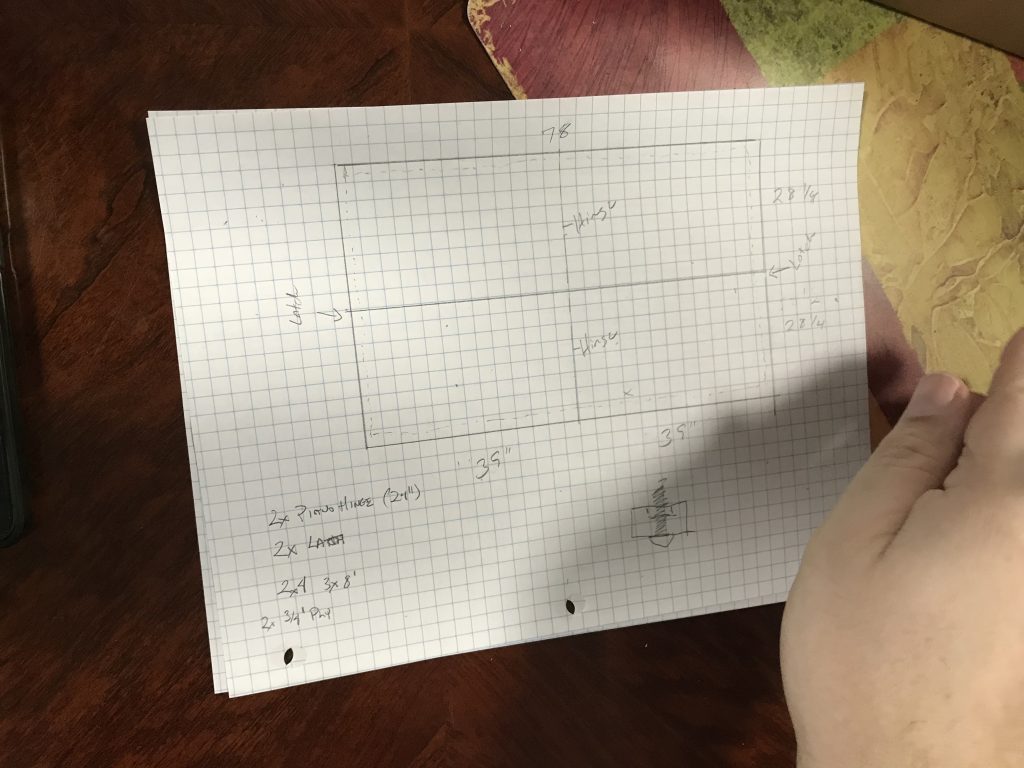
  1. First, I’m teaming up with a couple guys who are great with engineering and building unique pieces (including a TARDIS and a TIE fighter) to create a component for my studio that will facilitate not only my photography, but also help your pets look their best for my camera!
  2. Then I’m investing a fat chunk of money to upgrade my lighting system.  New speedlights, triggers, brackets, stands, modifiers–THE WORKS! I’m having a very hard time waiting to push the “SUBMIT ORDER” button on these purchases.
  3. Next, a few “test dogs” are coming in to run a final trial with the new rig!
  4. Finally, I will show and tell YOU more about it!!

This is the part where you come in.  If you want to be in on this ridiculously fun portrait set up for dogs (sorry cat lovers, felines are just not cut out for this particular project), please sign up to get more information as things are finalized.  When this project is absolutely ready to come out of the oven and fit for public consumption, I’ll send out an email JUST TO THIS SPECIAL GROUP and give you FIRST DIBS on scheduling session appointments.*

To the best of my knowledge, NOBODY is doing this in Oklahoma on a regular basis.  Which means you’ll be among the FIRST to have this style portrait of your beloved dogs!

Get to clicking folks, and get on the list to schedule an early bird session for this project that I just KNOW you’re gonna love!!

*All sessions will take place in Oklahoma City.  This is not a travelling circus… yet!

I promised in my last blog post about clutter that I would write next about good light vs. bad light.  And since then, I’ve been having a little anxiety about this post because what I have to tell you is simple. Almost too simple to warrant a whole post, but let’s see what we come up with.  The simple truth is:

There is no such thing as bad light.

Lemme say it again.

THERE IS NO SUCH THING AS BAD LIGHT.

Light is totally subjective, like color, sound or flavor.  Whether or not you like a color has no bearing on its goodness or badness.  Likewise, my friend Danny LOVES spicy foods, while our mutual friend Eric does NOT.  (Caps for emphasis. In this case, those words should also be bold, italicized, about about ten points larger to make the point of how much they love and do no love, respectively, spicy food.) Someone else may find a lot of comfort in a scent that drives you bananas (for example, the smell of the Pachyderm building at the Oklahoma City zoo feels like home* to me**, while most people just think it smells like poop).  Our opinions about these things do not define them.

Whether or not light is “good” or “bad” is entirely subject to whom is using it and for what purpose. Light simply IS.  It has different characteristics like, hard or soft, bright or dim, warm or cool.  But none of it is bad. Conversely, none of it is really good either! It just IS.

So why do you hear photographers talk frequently about good light or bad light?  Because we’ve found the light we need for our current project–for our vision of what we’re working on right now.  Or we haven’t found it, if we’re talking about “bad light”. The project we work on next however, might require completely different light characteristics.  And none of it is bad!

Goodness knows I’ve used these words!  With one of my early engagement couples, I scheduled them for the golden hours: the one-two hour window before sundown in which the sunlight comes in at a low angle, and is “softened” considerably, and is typically a really warm golden tone.  Only it was overcast and grey, with a thick blanket of clouds blocking my warm evening light. And our location was thick with trees, further reducing what light was available. It was “bad light” because it wasn’t what I wanted. We ultimately scheduled a second shoot because I wasn’t happy with what I was seeing.  Truth be told, at that point in my career, I didn’t have the gear or the experience to take full advantage of what light I did have.

Our next session was almost exactly the opposite.  We’d gone a little earlier and had buckets of hard, bright, direct sunshine!  Which was also not quite what I wanted, so again, I had “bad” light! This time, however, there was so much more light to work with, that I was able to use the trees and even my subjects to modify the light in my favor.

They liked the new images much better too.

Now you know.  If you didn’t already.  When a photographer or other artist comments on the light being good or bad, you know it’s just not what they want for their creative vision.  They may or may not be willing/able to work with what they’ve got, but trust them. Trust them to know not only what they need for the current project, but also what they can do with the tools available.


* No, my home doesn’t smell like that–well, not quite, but I do have three cats and a dog.
** Remember, I used to work at the zoo when I was much younger and a lot of that time was spent in the Pachyderm building.

I’ve had my head buried in some numbers most of today, and I am in DESPERATE need of a brain break. A change of thought patterns, scenery–anything will help!


So here I am, writing to you guys about little things you can do to improve your own photography.  Today’s subject? Clutter, and how to remove it from your images!


Clutter can be anything from actual trash lying around, to electrical poles or their wires, to traffic signs.  Really, any of the little things in a picture that can distract us, or take our eyes away from the subject. You may not see them at first, but I’m going to help you look for them BEFORE you take your picture.


The first thing to do is this:  look around. You’ve got your camera up, you’re ready to take the picture of your subject, you’re about to push the button and–WAIT! Yes, really. Let your eyes cruise around your subject, along the far edges of your image. What do you see?


Trash. This one is painfully obvious.  When I’m going on location for a portrait session, I often take a couple plastic bags with me and arrive early, specifically to walk the area and pick up trash. Yes, really! There are some local parks that offer great backgrounds, but are just wicked cluttered with little bits of trash, either from nearby residents that just don’t care, or a creek that overflows every time it sprinkles. I don’t want that clutter showing in my portraits, and so I spend an extra half hour walking around picking things up.  This also gives me a great chance to scout specific spots at my location. You aren’t likely to be be taking a couple hundred pictures in multiple locations in the same park, so my method is probably overkill for you. But if you do see trash in your frame–GO PICK IT UP. It probably won’t bite you, and if you don’t stick your fingers in your mouth or eyes, it likely won’t make you sick. If you’re seriously worried about germs, carry some hand sanitizer, assuming you’re not somewhere with easy access to soap and water.  Your pictures will be better for your effort. Plus you get extra gold stars for picking up litter, yay!


Power lines.  Change your angle in relation to your subject.  Get your camera up higher and looking down on your subject a bit.  This might mean simply raising your camera higher. Or it might mean climbing up on the nearest thing.  I like to carry a lightweight aluminum step stool with me during my sessions. If you can’t get higher, maybe your subject can get lower.  If your subject is human, can they sit down? Kneel? Squat? Or maybe your subject is a landscape, and you can’t get higher than it is–it’s probably not getting any lower.  Can you move closer to your subject and get the power lines out of your frame? Or far enough away that they disappear into the scene?


Signage and cars.  A few blocks away from me is a lovely residential street with a grassy median running down the middle.  Big leafy green trees offer lots of shade in the summer and the turning leaves are just gorgeous in the fall.  But the street is also lined with cars parked along the curb and the ever (NOT) photogenic traffic signs. You can try some of the same tricks we used to avoid the power lines, but it might be easier to block these signs/cars with your subject.  Yeah, that’s right. Position your subject so THEY are blocking the offensive object from your camera frame. If changing position isn’t an option, try zooming in on your subject so they fill your frame, or very near to it.


People. These pests are particularly problematic at popular scenic locations. My advice for getting them out of your image frame?  Choose unusual times to go to your destination. Early morning is generally less busy than the evening, in almost all cases, so if you can pry yourself and your subject out of bed, this is often the best way to avoid throngs people.  Cuz nobody else wants to get up yet either. Or if it’s a popular morning spot, aim to arrive after everyone else has left. If neither of these is a good solution, try an unusual angle. Head right away from the spot where all the other tourists have gathered with their cameras and look for a scene that still communicates your location without including a bunch of strangers.  Sometimes it’s simply a matter of patience and allowing people to walk out of view before you press the shutter button. And you might be surprised how many people will stop to avoid walking through your set up. One last trick to dealing with people… just roll with it and see what kind of photo bombs you get!


It’s super easy for us NOT to see the things we don’t want to see.  Traffic signs practically disappear, especially in places that are familiar to us.  We learn not to see trash on the ground, simply because we don’t enjoy it. Power lines too are so common, especially in urban areas, that we totally forget they’re there.  Take an extra moment to look around the edges of your view through the camera for those little bits of clutter. Get them out of your image, and your pictures will thank you!  Your subjects will thank you–honestly, they probably won’t, because they probably didn’t see those things to begin with! If they did, they’ll think you’re a magician for keeping them out of the picture.  Great job!!


Next post?  I think it will be about light.  Are there really such things as “good light” or “bad light”?  Stay tuned!!

TL;DR Take a moment to look at your subject in a different way.

So many times we see something image-worthy, and we pull out our big honkin’ SLR camera with the big ‘ol lens (is that just me?), or our handy pocket sized point-and-shoot, or more than likely our PHONE, cuz that’s the one we have with us most of the time, and we capture the beautiful/interesting/adorable/disgusting thing we see right now, just as we see it, to save for all time.  And then we look at the image we just captured, and it’s JUNK. It’s flat, it’s boring, it’s dull, it’s blurry, it’s overexposed, it’s underexposed, it just doesn’t capture the essence of what we saw!

And sometimes, that’s the best it’s going to get!  Some scenes occur so quickly that there really isn’t time to capture them well, to do them justice with a camera. Not even Photoshop can help that mess!

But a lot of the time, if we slow down and take just a single minute longer… we can put a little more effort into really portraying that beautiful/interesting/adorable/disgusting subject and getting an image worth showing off to our friends and family.

So what can we do in just a few moments to improve an image?  SO MANY THINGS!

  • Focus – Not your camera, focus YOU.  Take a few seconds to really LOOK at your subject and observe what it is about it that drew your attention.  NOW you can focus your camera on that detail, and share with the rest of the world the amazing thing you saw.
  • Move around – Literally walk around your subject (where possible) and look at it from different angles.  An amazing composition may magically appear to you when you move around your subject even a step or two. The light and shadows may be better, or that tree behind them may no longer be “growing out of their head”, or the buildings behind it may line up just so, and suddenly your composition is so much stronger.  Seriously, just a few steps. Indulge me.
  • Change your perspective – We have a habit of taking our pictures exactly as we see them right now. But what happens if we sit down? Stand up? Squat? Lie down? Climb up on a chair? Climb up in a tree?  Turn our head sideways? Yes, I know it’s not always appropriate or possible, but when it is, try changing your position. If nothing else, this may allow you to see your subject in a new way and change your perception of it, even if it doesn’t grant you a better picture.  *Especially* with kids and animals, get down on their level, and see how your image improves.
New York City's Statue of Liberty, taken from below and to her right, and zoomed in to show primarily her face.
I walked completely around Liberty Island looking for this image.
  • Get close – This one isn’t always appropriate, because sometimes we really do want to capture that great big scene.  But if we want an image of little Susie with the goat at the petting zoo, we don’t need a picture of the entire petting zoo including the thirty other people there.  Get as close as you can while still keeping them both in the frame. Move your feet if you have to.
  • Get even closer – Really.  You just got a great shot of Susie and the goat.  Now get closer. Use the zoom in your camera if you must, but it is almost always better to zoom with your feet.  See if you can get just Susie’s darling rosy-cheeked face, eyes aglow and intent on the weird way goats move their mouths.  See if you can get close enough to make little details like her eyelashes your primary subject.
  • ***Bonus tip*** You can focus your cell phone camera usually with single finger a tap on the main point of interest.  Normally, your phone will automatically try to put the entire scene in focus, but if the focal point should be the flower pot, not the building behind it, get that flower pot in the scene, then tap on it. As much as possible, your phone will do it’s best to get the flower pot in focus, blurring the building behind, creating separation, and adding more visual interest to your image.

You probably won’t remember to do ALL these things every time you raise a camera to take a picture.  But if you have a minute and you remember to do even one of them, you’ll improve your picture taking a bit.  And the more often you do one (or more) of these, the more often you’ll remember it, and the sooner you’ll start using more of them.

Now go!  Get your camera, even if it’s just the one in your phone. Each time you pick it up to take a picture ask yourself if you can take a few more seconds to get a better (or your best!) picture.  And whatever you do, HAVE FUN!

#2 Super Quick Photography Tip


If you read no further, this is the tip in a nutshell:  shoot what you love.  If you want a wee bit more detail, stay with me for a few minutes.  I won’t keep you long, I promise. 


To get the best possible photographs you can, whether those are people portraits, nature landscapes, or anything in between… shoot what you love, and do it as often as you can.


If you love your kids and your pets and the sunrise over the pond in your backyard, take pictures of those things.  Separately, or together if you can pull it off! If you live in the city and love the mountains, take road trips and pictures as often as you can manage it.

Of course, my children have been favorite subjects for a LONG time!

Take pictures of those favorite loved things in different kinds of light, at different times of the year, in different places, with different cameras, when you’re in different moods.  There is no wrong time or way to capture your passions visually.

My latest photographic obsession.

I recently updated my About Page to reflect my why.  Why I have a photography business, how I got where I am now, and what I want to provide my clients.  The story that’s not told there is that it’s a constantly growing and changing thing. What I love to capture with my camera shifts over time–some days animals are the worst possible subjects!–and it will for you too, but the best way to get better, is to keep doing it, and it’s easiest to keep doing if we do it with the things we love most.  Follow your passions, even as they change, and photograph them as often as you–and they–can stand it, and your photography will get better and better and better. I truly believe mine has, and is improving much more quickly now that I finally remembered my why.


If you DON’T know what you love… photograph all the things that interest you until something comes bubbling up to the top as a preferred subject.  Review your pictures in your phone every now and then and see if you notice any trends.


If you stuck around to the end of this little missive, yay!  I hope you love taking pictures. I hope you love your subjects.  And I hope your photography journey takes you where you love the pictures you take of things you love.

I’ve been rolling this idea around in my head for a while now, and I thought it might be time to try it on for size.  The idea is this: start blogging here on my photography website.  Great idea, right?  I suspect about three people will read these, and one of them will be my mom.  But what have I got to lose?  Hi mom!!  Hello two other readers, I’m so glad you’re here! If you’re not here because you’re my mom, welcome to an actual super quick photography tip!

Welcome to OK Kat’s el numero uno blog post!  What’s this blog gonna be about anyway?  I thought I might start out with some super easy tips for how to improve your own photography. Yes, even on your cell phone!  I had the chance earlier today to test this notion out on a friend and they were responsive to the little tip, so I’m sharing it with all of you, too.

It’s also possible that I’ll sprinkle in some posts about upgrades and improvements I make to my equipment or gear.  And maybe even some behind the scenes shots when I can get those!  Or what about YOUR session?  It’s possible that I may blog in the future about client sessions, but we’ll get to that eventually.

Enough with the babbling nonsense, I mentioned a photography tip, didn’t I? Let’s get to it! My number one super quick tip for photography: Try to make the horizon line level.

See there?  Super quick, super easy, don’t even have to think about it much.  And with our cell phones?  A snap to fix, even if you didn’t get it level when you shot it!  Let me show you a quick comparison.  I borrowed this picture from my friend Jay, the very friend I mentioned earlier being responsive to this very same tip.  He was also kind enough to let me borrow the picture to share with you here.  Thanks Jay!

Jay’s Unaltered Image

Nothing fancy here right?  He was showing me how high the water was where normally there is beach.  And we have a tendency to automatically correct these slanty horizons in our brains, right?  You might not even have noticed it if it wasn’t pointed out to you.

But, a quick edit on my phone (iPhone 7, for those to whom it might matter):

Editing Jay’s image

If I open the image for editing, there just below the picture is a wheel with degree marks on it.  No idea how this looks on an Android phone, I kind of assume they have similar features.  But I can rotate the picture by mere degrees!  My phone even tried to make a suggestion for me based on what it thought I was after.  In this case, it was wrong, because it leveled the image based on the fence board there in the lower section.  Here’s my finished product:

Jay’s image with my edit

Just this one quick little fix and Jay’s snapshot at high tide looks better! We can still see the rocks there at the bottom, so we know there’s no sand in sight.  No beach. =(  His message is not lost in the edit.

Will your friends and family notice if you start watching your horizon lines?  Probably not!  But YOU will.  And you’ll watch for horizon lines now in pictures all over the internet.  This is stuff you can’t UNSEE once you know about it!  Maybe I should be apologizing because now you really will see them everywhere.

But this is a good thing if you’re comparing photographers!  Now, as well as knowing something to do to improve your own photography, you also know something to look for when considering a photographer.  Yes, I’ve seen a LOT of professional photographers that don’t level their horizon lines!  Is it the end of the world?  Nope.  Can an image still be attractive even with a slanty horizon?  Sure!  There may even be times you want to break this rule for artistic purposes! But you gotta know the rules to break them effectively, right?

There you have it folks.  First blog post.  First tip.  I’ve got loads of these rattling around in my brain, so keep an eye out here in the future. We’ll talk more!!

Got tips of your own to share?  Put them in the comments here or on the FaceBook page!